Have you heard of tunnel books? I saw my first tunnel books at The Milwaukee Art Museum recently. Each tunnel book was made from a series of paper layers, tied at their sides.

Then, a light was cast down from above to illuminate the whole scene. There is a lot going on here in these intricately cut layers. There are all sorts of critters and skulls. One skull is even growing like a plant. It's like an enchanted forest, luring this girl in. But you get the idea that it has lured other people in and kept them there.

That photo above is actually the wallpaper on my computer now. You can see a bit of the light above the paper here and the thread/twine holding the papers together:

A second tunnel book showed a more vertical scene.

You can really see the way this is held together in this photo.

You can also see the quality of the paper, which is nice and thick. It would have to be. Imagine how difficult it would be to cut out these details and not mess up with thin paper. I'm sure this was a challenge too, but the high quality paper had to help. If you're interested in the specific paper, I read that the artist used high-quality Japanese Kozo paper on this one.
And as an added bit of trivia, Kozo paper is made from the bark of the Mulberry bush. I just watched a video about the making of Kozo paper, from Mulberry bush to the final product. Wow. What a lot of work. I'd really feel the pressure to cut this paper just right after seeing how much effort goes into making it.
Kozo Paper making:
Back to the tunnel books. Here's the view from above. I read that these can also be lit from below.

The artist is Andrea Dezsö. If you'd like to see more of the artist's tunnel books, here's a link: Andrea Dezsö's Tunnel Books
Tunnel books were pretty popular during Victorian times. According to what I read in the exhibit, this artist likes to work with fairytale themes that are similar to those in the old time tunnel books. What kind of fairytale do you think is being shown here? I'm reminded of Snow White a little because of the forest creatures.

And the skulls make me think of the poison apple:
The first tunnel book I showed you was titled "Enchanted Forest: Girl with Bee" and the second was "Bird and Girl Resting". So if she was going for a theme related to a fairytale we know, I can't guess it from the titles. You might also be interested to know that the first tunnel book wasn't made from Kozo paper, but a paper called Shojoshi. I looked that up too and was surprised to see that it's traditionally used for calligraphy and watercolor painting.
In looking at videos about tunnel books on YouTube, I ran across an awesome tutorial:
It just so happens that I have a wood box/wide frame on hand that I cut for another project years ago! Just yesterday, I was staring at it, hoping that some idea would come to mind for how I could reuse it. No idea came to mind at that time, but who would think that one day later an idea has presented itself? What timing!
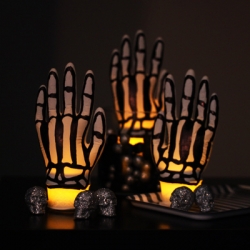
So, what do you guys think? Does this look like a fun project? Just think of what you could design around a Halloween theme!


You can also see the quality of the paper, which is nice and thick. It would have to be. Imagine how difficult it would be to cut out these details and not mess up with thin paper. I'm sure this was a challenge too, but the high quality paper had to help. If you're interested in the specific paper, I read that the artist used high-quality Japanese Kozo paper on this one.
And as an added bit of trivia, Kozo paper is made from the bark of the Mulberry bush. I just watched a video about the making of Kozo paper, from Mulberry bush to the final product. Wow. What a lot of work. I'd really feel the pressure to cut this paper just right after seeing how much effort goes into making it.
Kozo Paper making:

Tunnel books were pretty popular during Victorian times. According to what I read in the exhibit, this artist likes to work with fairytale themes that are similar to those in the old time tunnel books. What kind of fairytale do you think is being shown here? I'm reminded of Snow White a little because of the forest creatures.
And the skulls make me think of the poison apple:
In looking at videos about tunnel books on YouTube, I ran across an awesome tutorial:
So, what do you guys think? Does this look like a fun project? Just think of what you could design around a Halloween theme!