
There has been one Halloween craft I wanted to be sure and make during this season. It was a craft I'd seen a few photos of online: a donut pumpkin!
Some of you might know that I've been looking all season for the perfect, donut-shaped pumpkin so I could make this creation. This is easier said than done. There are a lot of different pumpkin shapes out there, and for the most part those shapes are not like that of a donut.
After much searching, I was very lucky to find a little pumpkin at Dollar Tree! I was extra lucky because I think it was accidentally packed in with a shipment of totally different pumpkins. I peeked into an unpacked cardboard box that the Dollar Tree employees hadn't gotten to yet. Inside were plenty of yellow and orange pumpkins with flowers coming out of the top. Floating around with all of them was this little guy:

Looking at the image on the side of the cardboard box, I could see that no green pumpkins were included in this shipment. And I never saw another one through the entire store! So, lucky me!
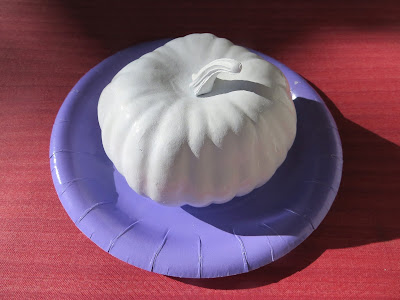
My first step was to spray paint the pumpkin white. It looked almost like stone or ceramic at that point.
Next, I painted more or less the top half of the pumpkin pink.

Then I coated the pink part with this clear, glittery paint called "Disco Crystal". I thought it gave the pink "frosting" a subtle, glazed look. You can see what the paint looks like here: FolkArt Disco Crystal You can get it cheaper than this with a Michaels coupon, etc. I've used this paint on so many projects! It's great for sticking loose glitter on crafts too.

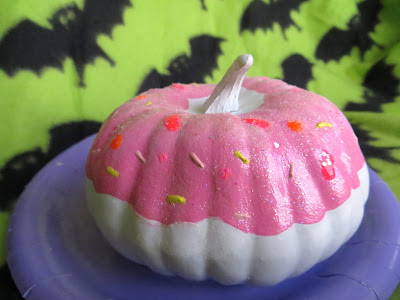
Which is just what I did! Now things were starting to look yummy.

But I wasn't done yet! Time for sprinkles! The "sprinkles" are actually little lines of puffy paint. Yes, I still have puffy paint like you'd use on clothing back in the day. It stayed good since the early 90s!

Mmm... I know better than anyone that this is plastic, paint, and glitter, but I'm still wanting to eat this donut! Never mind that it also has a stem.

With any luck, I'll find some more donut-shaped pumpkins so I can make a few more of these. I'll have an eye out for more during my After Halloween Hauling!


After much searching, I was very lucky to find a little pumpkin at Dollar Tree! I was extra lucky because I think it was accidentally packed in with a shipment of totally different pumpkins. I peeked into an unpacked cardboard box that the Dollar Tree employees hadn't gotten to yet. Inside were plenty of yellow and orange pumpkins with flowers coming out of the top. Floating around with all of them was this little guy:

My first step was to spray paint the pumpkin white. It looked almost like stone or ceramic at that point.


