The weather has become very cold in Wisconsin over the past few weeks. We have been lucky to have temperatures in the double digits! One way I've been trying to stay warm is to drink a lot of tea. For those who are interested, I've been drinking a lot of Stash MerryMint tea and Stash Licorice Spice tea.
Drinking all this tea inspired me to write something tea related. I've always been intrigued by people who read tea leaves, but have never had this done for me. Sometimes, as I finish a cup of tea, I will look in the bottom of the cup and think about the shapes I see. I've never taken it any further than that.
Trying to read my tea leaves (or whatever is left in the bottom of my cup) sounded like a fun experiment and good blog material. Aside from thinking I needed loose tea, I didn't know much about the process.
To help myself along, I decided to find some YouTube tutorials. Every time I need to learn how to do something, I head to YouTube. There are endless videos on how to read tea leaves there. The first video I ran across showed how to do this by tearing a regular tea bag. These instructions involved a lot of symbolism. I found it comparable to reading Tarot cards, with different placements for past, present, and future. I had always thought of just one design or shape showing up.
The shapes seemed somewhat open to interpretation, like looking at a Rorschach Test or clouds in the sky. So I looked up a series of charts so I would have help in deciphering what I was seeing. Here are a few of them:
Glossary of Tea Leaf Symbols & Meanings
Tea Leaves - Tea Leaf Symbols
Tea Leaf Reading
Tasseography
This woman gave a really nice overview of the process too. I know this video is kind of small, but it's worth watching:
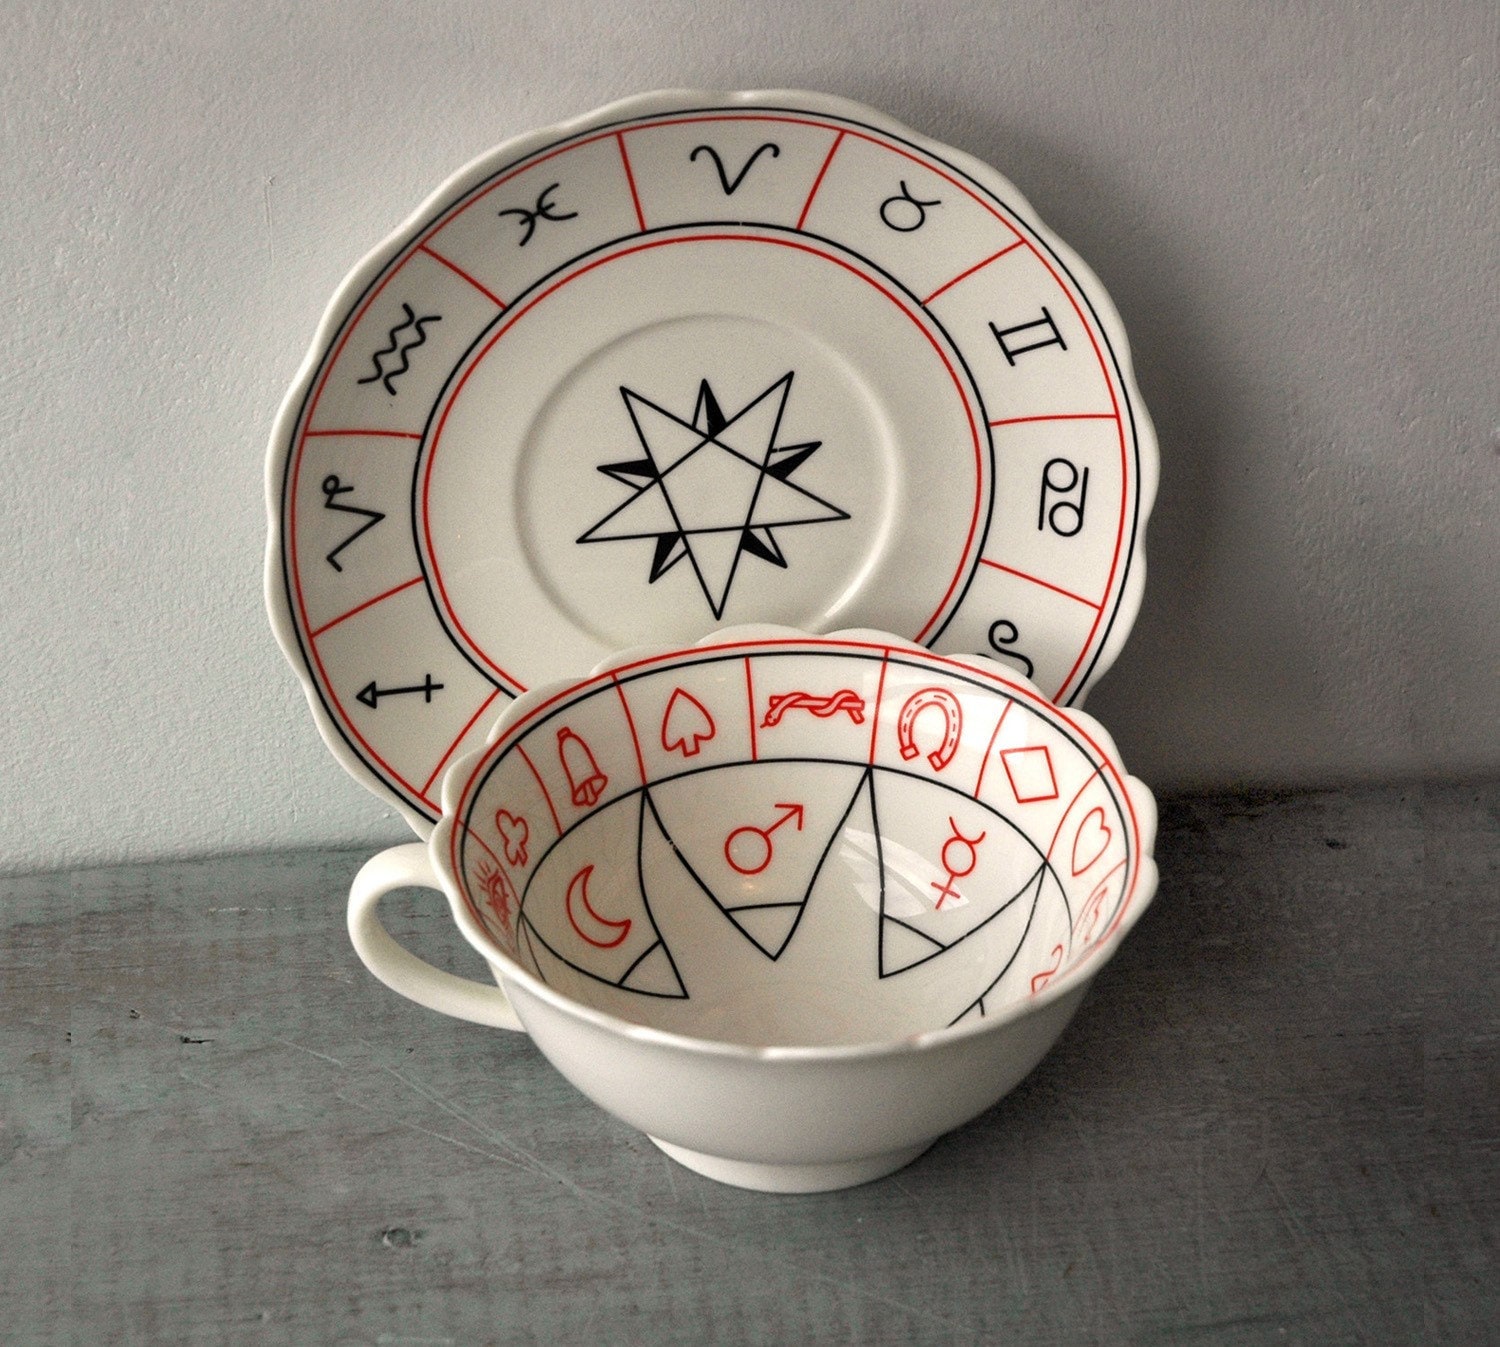
You'll notice that she had a cool Victorian style teacup with symbols printed right on it. Here's a close-up photo of a similar teacup:
It would be awesome to use one of those, but I had to stick with what I had. Luckily, I found another video with instructions on how to choose the right teapot, teacup, and tea type for the process:
So the first thing I did was to choose a tea cup. It turned out that I had a teacup in just the right shape, complete with a saucer:
I chose to go with Stash Double Bergamot Earl Grey for my tea reading. I'm suddenly realizing how much I like the Stash brand. I chose this one, because it's a black tea and would therefore show up in the cup. Then I went through the process, hoping to see something like this:
Here's what I did see:
As the woman in the first video said, the image to the left of the cup's handle is past, middle is present, and right is future. So, I'll show you a close-up of each.
Left:
What I see in this is a curled animal or snake.
Center:
This could be a question mark or a hook.
Right:
I see a crown.
These are totally up for interpretation, but the one on the right looked clearly like a crown to me. After studying the shapes and interpreting them, I consulted the online symbol dictionaries. According to those:
1) Snakes are about as unpleasant as you'd imagine. Luckily, the coiled snake is in the past postition.
"This is an unpleasant sign of treachery, disloyalty, and hidden danger, sometimes caused by those whom you least suspect"
Sadly, that's spot on.
2) Hooks are an addiction or obsession. Question marks are the symbol of hesitancy or caution. The question mark definition makes a lot more sense than that of the hook, so I'm going to say that's a question mark. I have been hesitant/cautious in starting some new projects, and I'm not addicted or obsessed with anything as far as I'm aware!
3) Crowns symbolize the attainment of your highest ambition. Hey, you can't beat that! I do have some goals that I'd like to attain (the ones I'm being hesitant about starting), so that's a nice positive image to see.
This process wasn't at all difficult, so why not give it a shot? I'd be
curious to hear about what you see, or even better, see a photo of it.
What I saw actually made a lot of sense for my life.
I'm open to any other interpretations of what was in my teacup. If you're used to doing tea readings, and have experience in recognizing these symbols, I'd really like to hear from you!
Drinking all this tea inspired me to write something tea related. I've always been intrigued by people who read tea leaves, but have never had this done for me. Sometimes, as I finish a cup of tea, I will look in the bottom of the cup and think about the shapes I see. I've never taken it any further than that.
The shapes seemed somewhat open to interpretation, like looking at a Rorschach Test or clouds in the sky. So I looked up a series of charts so I would have help in deciphering what I was seeing. Here are a few of them:
Glossary of Tea Leaf Symbols & Meanings
Tea Leaves - Tea Leaf Symbols
Tea Leaf Reading
Tasseography
This woman gave a really nice overview of the process too. I know this video is kind of small, but it's worth watching:
You'll notice that she had a cool Victorian style teacup with symbols printed right on it. Here's a close-up photo of a similar teacup:
So the first thing I did was to choose a tea cup. It turned out that I had a teacup in just the right shape, complete with a saucer:
I chose to go with Stash Double Bergamot Earl Grey for my tea reading. I'm suddenly realizing how much I like the Stash brand. I chose this one, because it's a black tea and would therefore show up in the cup. Then I went through the process, hoping to see something like this:
As the woman in the first video said, the image to the left of the cup's handle is past, middle is present, and right is future. So, I'll show you a close-up of each.
Left:
What I see in this is a curled animal or snake.
Center:
This could be a question mark or a hook.
Right:
I see a crown.
These are totally up for interpretation, but the one on the right looked clearly like a crown to me. After studying the shapes and interpreting them, I consulted the online symbol dictionaries. According to those:
1) Snakes are about as unpleasant as you'd imagine. Luckily, the coiled snake is in the past postition.
"This is an unpleasant sign of treachery, disloyalty, and hidden danger, sometimes caused by those whom you least suspect"
Sadly, that's spot on.
2) Hooks are an addiction or obsession. Question marks are the symbol of hesitancy or caution. The question mark definition makes a lot more sense than that of the hook, so I'm going to say that's a question mark. I have been hesitant/cautious in starting some new projects, and I'm not addicted or obsessed with anything as far as I'm aware!
3) Crowns symbolize the attainment of your highest ambition. Hey, you can't beat that! I do have some goals that I'd like to attain (the ones I'm being hesitant about starting), so that's a nice positive image to see.
I'm open to any other interpretations of what was in my teacup. If you're used to doing tea readings, and have experience in recognizing these symbols, I'd really like to hear from you!


